Testplans
- Blank lines are ignored.
- Lines starting with an asterisk (*) are considered comments and are ignored.
- Inline comments are not supported; that is, you can comment out an entire line, but not a portion of a line.
- Each non-blank, non-comment line in the testplan describes a set of test conditions for a single test. Each column performs some action during the test.
- The testplan can have a header row. The first entry on the header row starts with *?@. The program reads the file and identified the header row by looking for this special three character sequence.
- Any column can have an empty cell in a row but the behavior is different for columns
with function headings.
- If the column heading is a function, such as Var(vout , 1.2), DVM uses the default value, in this case 1.2.
- If the column heading is not a function, DVM makes no changes for that column where a cell is empty.
In this topic:
Testplan Content
There are two ways of defining a testplan entry:
-
Without a header row, each field must include a prefix to indicate the desired
action. For example:
simulator: simetrix include: include1.txt simulator: simplis include: include2.txt -
With a header row you can avoid prefixing each field by including a specially
formatted comment line with the prefix that functions as a column heading.
*?@ column1 column2 column3 column4 value1 value2 value3 value4 value5 value6 value7 value8 Note: When you use the create a testplan with the format above, the simulator regenerates the information into the format shown below, which is the equivalent structure that you would use without the header row.column1: value1 column2: value2 column3: value3 column4: value4 column1: value5 column2: value6 column3: value7 column4: value8
Testplan Syntax
The following prefixes and functions are supported as testplan column headings. For details about each, click the link in the list below.
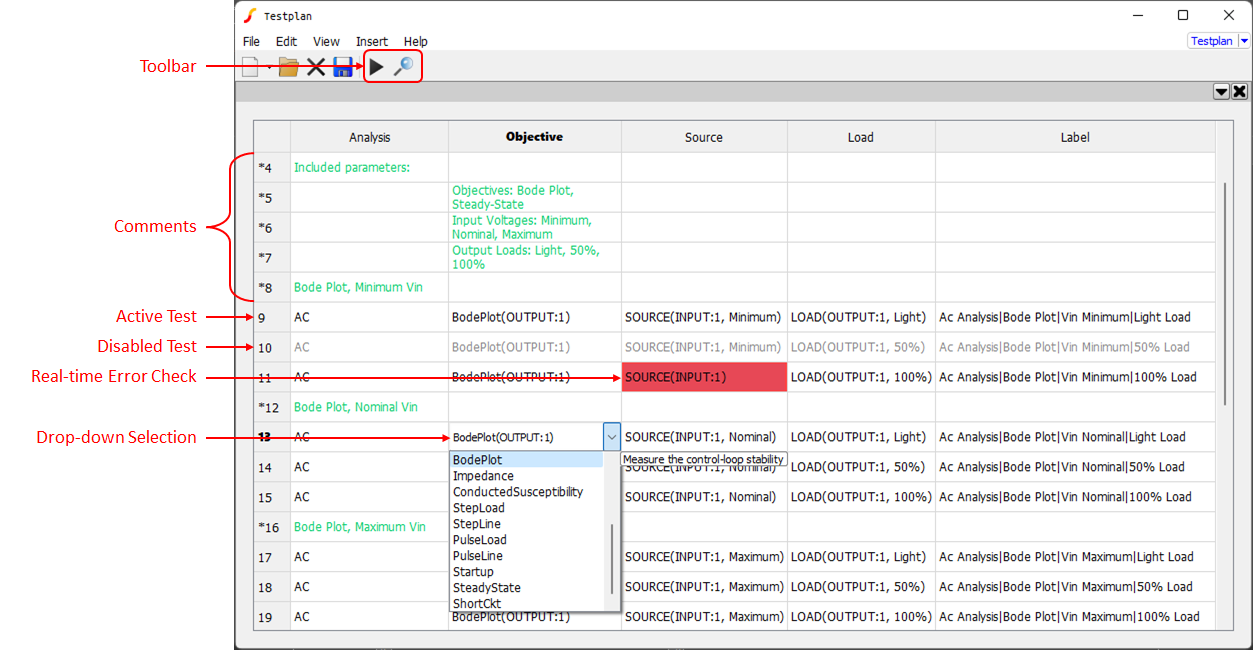
Testplan Editor
- Objective
- Source
- Load
- Measurement
- Promote
- Create
- Suppress
- Simulator
In addition to cell entry assistance, the Testplan Editor also provides real-time error checking. Hover over colored cells to receive further information.
Overview
- Black colored text denotes a test row
- Green colored text denotes a comment row
- Grey colored text denotes a disabled test row. This test will not show up in the test selection dialog when the testplan is executed.
Context Menu - Rows
Use the context menu for the rows to insert a test or comment, enable or disable a test, move a row up or down, and delete an entire row.
Context Menu - Columns
Use the context menu for the columns to insert or delete a column and move a column left or right.
Toolbar
| Run Testplan |

|
| Audit Testplan |  |
Testplan Wizards
Testplan wizards will allow the dynamic creation of a DVM testplan that includes only user-desired Objectives and circuit inputs and outputs.
DC-DC 1 Input 1 Output
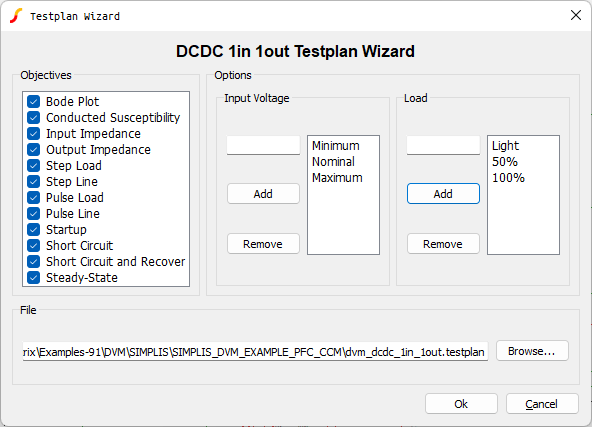
Menu Item:
DC-DC 1 Input 2 Output
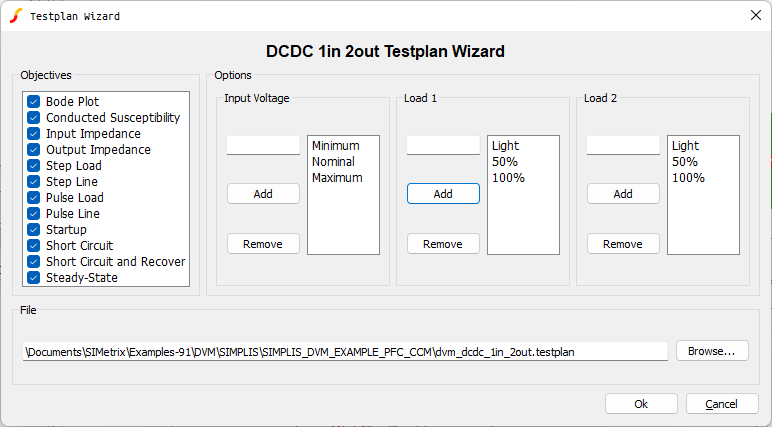
Menu Item:
AC-DC 1 Input 1 Output
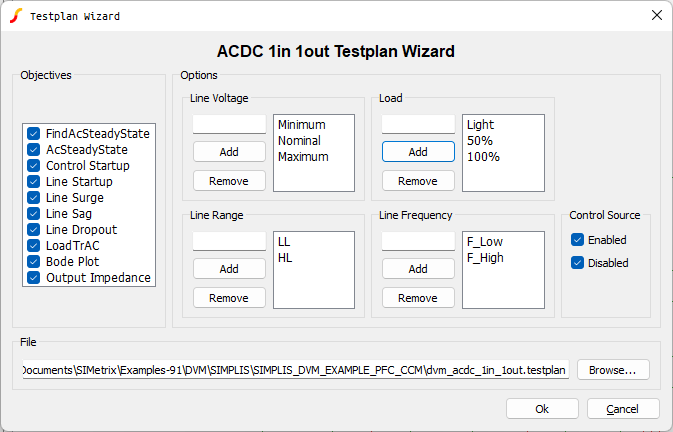
Menu Item:
Usage
Select the desired objectives from the Objectives section. Then, set the desired input/output values in the Options section. To remove an item from a list, select the item (hold Ctrl to select multiple) and press the Remove button directly to the left of the active list. To add an item, enter the text in the input field and press the Add button directly to the left of the active list. Allowable entries are numbers, percentages, and Symbolic Values.